My friend Irene left a comment a couple of posts ago about my open notebook next to a block I had photographed, so I thought I would elaborate on it a bit.
Yes it is my ‘work-book’ and it is my life line when it comes to writing up a new quilt pattern, by the time I finish a quilt and then write the pattern I need this book in order to know what I did.
I usually start my design on EQ6…I have an idea in my head about what I want to make (usually heavily influenced by an antique quilt in a book) and on the computer I start playing around with blocks/settings/borders etc.
Of course, I can’t wait until the whole quilt is designed before I start sewing so I will often start trialing fabrics once I”ve decided on just the centre. I really just have to start sewing so I can see if I’m happy with the fabrics…there is a limit to what you can achieve on a computer and I just have to see it in the real…Now.
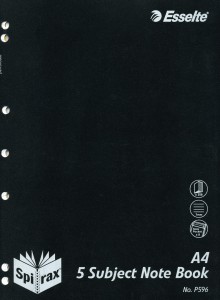
That’s where my work-book comes in, it’s nothing flash, just a school book available from any office supply shop.
What I like about it is that it is divided into 5 sections and between each section is a double sided pocket, perfect for keeping templates or other relevant ‘stuff’ in so it doesn’t fall out.
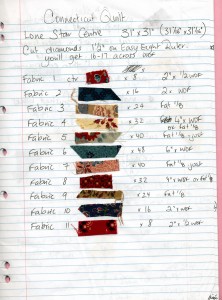
In the photo below you can see the start of my Connecticut Quilt. I have been very organised and named the quilt but I have not put the date at the top…not good, I pledge to date the start of a project in the future.
You will notice WOF which is ‘shorthand to self’ meaning width of fabric, I always note how many units I can cut from 40″ (I allow 40″ to be safe even tho most fabric is 42″…you never know when you’re going to get a really deep selvedge and because I’m writing patterns, I would feel responsible if someone didn’t have enough). Tho actually, by the time I get to writing the pattern I will still allow a bit extrain the fabric requirements…just in case.
I paste the fabrics into the book, in this example it’s the eleven fabrics for the centre star and a note about how many diamonds I need from each fabric and how many across the WOF or in some cases a Fat 1/8.
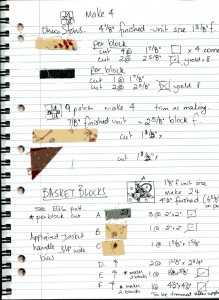
At the moment I’m working on the Basket blocks which go around the centre star. I got back on EQ6 and fiddled about a bit until I was happy with the scale and that everything would fit and then noted and pasted in my book what I had come up with so now I can work off these notes and make corrections if necessary.
When I was at 6-midnight at Threadbear a couple of weeks ago I got all the basket ‘bottoms’ made and am now up to appliqueing the handles on to the triangles.
If I can offer one piece of advice about using this method of note-taking it would be to always always always write the finished size of the block/unit (you know that means the size without a seam allowance don’t you). It’s the finished size you need to know in order to know that things will fit. Cutting sizes are clearly marked ‘cut’.
On another topic, I have been catching up with my customer’s quilts this week and have been ‘pedalling’ away at the Long-Arm machine like a woman possessed. I feel very virtuous.
Til soon…

Thanks for this post Margaret! I do my pattern drafting in a similar way but i have plastic folders for each project – only because i do so many I design at one time – if i had a notebook then i’d stress out about how many pages to give each quilt etc. (useless stressing of course). And yes i agree – i too work on the 40in width – just in case. But I will have to start using EQ5 and 6 more to help with the scale of blocks – so I may need to come back for some more lessons.
Irene